Bagaimana Membuat Solar Cell Sendiri 2
I made a more portable version of the solar cell in a flat panel form. I used the clear plastic top from a plastic CD jewel case as the window, and lots of silicone rubber glue to both attach the pieces together and to insulate them from each other.
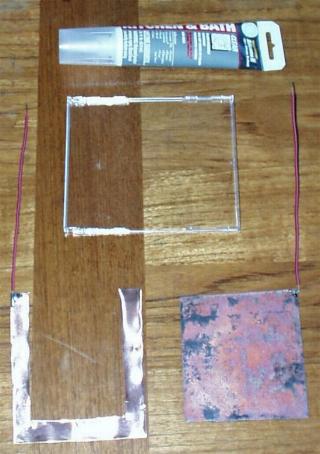
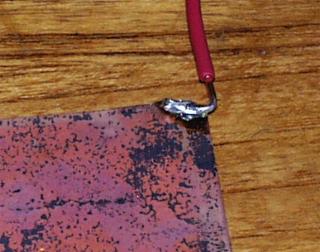
The first step is to make a cuprous oxide plate like we did in the first solar cell. This time I sanded one corner clean all the way down to the shiny copper, and soldered an insulated copper wire to it for the negative lead.
The positive plate is a U shaped piece cut from the copper sheeting, a little bit larger than the cuprous oxide plate, with the cutout portion of the U a little bit smaller than the cuprous oxide plate. Another insulated copper wire is soldered to on
e corner of the U.
e corner of the U.
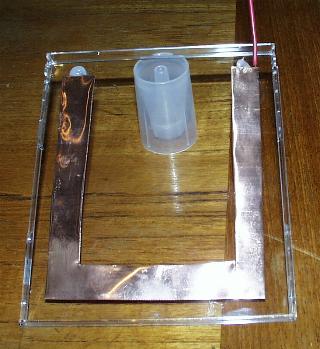
The first step in construction is to glue the U shaped copper plate to the plastic window. Use plenty of silicone glue, so the saltwater won't leak out. Make sure that the solder connection is either completely covered with glue, or is outside of the glue U, as shown in the photo (completely covered in glue is best)
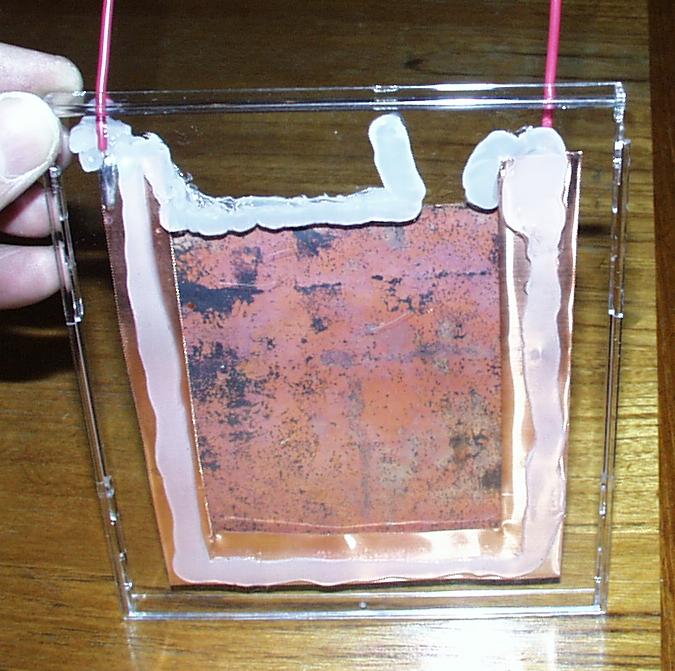
The photo below shows the back side of the solar cell (the side not facing the sun) at this point in the construction.
The next step is to lay a good size bead of glue onto the U shaped clean copper plate. This layer will act as an insulator between the clean copper plate and the cuprous oxide plate, and must be thick enough to leave some room for the saltwater. Again, not all of the copper is covered, so there will be plenty of copper in contact with the saltwater.
Gently press the cuprous oxide plate onto this layer of glue. You should press hard enough to make sure the glue seals off any gaps, but not so hard that the two plates touch.
The photo below shows the back side of the solar cell (the side not facing the sun) at this point in the construction
Gently press the cuprous oxide plate onto this layer of glue. You should press hard enough to make sure the glue seals off any gaps, but not so hard that the two plates touch.
The photo below shows the back side of the solar cell (the side not facing the sun) at this point in the construction
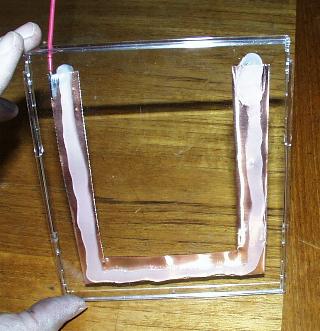
The photo below shows the front side of the solar cell (the side that will face the sun) at this point in the construction. Notice that the silicone glue does not completely cover the copper, since some of the copper must eventually be in contact with the saltwater.
The next step is to lay a good size bead of glue onto the U shaped clean copper plate. This layer will act as an insulator between the clean copper plate and the cuprous oxide plate, and must be thick enough to leave some room for the saltwater. Again, not all of the copper is covered, so there will be plenty of copper in contact with the saltwater.
Gently press the cuprous oxide plate onto this layer of glue. You should press hard enough to make sure the glue seals off any gaps, but not so hard that the two plates touch.
The photo below shows the back side of the solar cell (the side not facing the sun) at this point in the construction
Gently press the cuprous oxide plate onto this layer of glue. You should press hard enough to make sure the glue seals off any gaps, but not so hard that the two plates touch.
The photo below shows the back side of the solar cell (the side not facing the sun) at this point in the construction
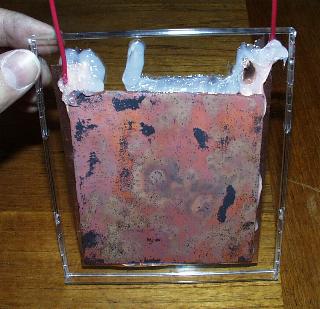
The photo below shows the front side of the solar cell (the side that will face the sun) at this point in the construction. Note that I added extra glue to form a funnel at the top to allow the saltwater to be added.
You can click on the photo above to get a bigger picture.
Not shown in the photo is a generous extra bead of glue all around the outside of the plates, to ensure that no saltwater will leak out. Allow the glue to cure before going on to the next step
Next, use a large eyedropper to add the saltwater. Fill the cell up almost to the top of the copper plate, so it almost spills out. Then seal the funnel with another generous bead of glue, and allow the glue to cure at least a half hour
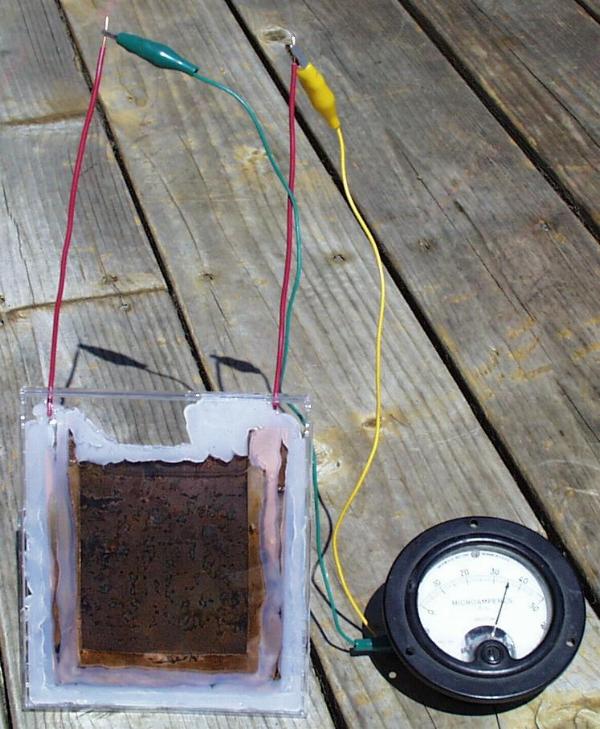
In the photo above you can see the flat panel solar cell in action in the bright sun. It is delivering about 36 microamperes of current. You can also see the extra bead of glue around the edges of the plates, and filling the top of the funnel.
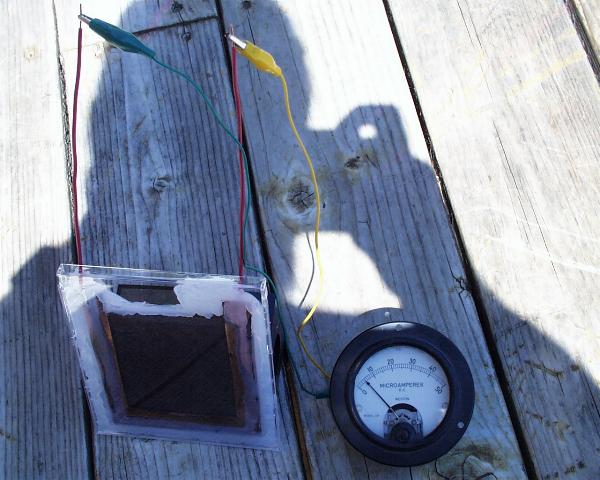
Finally, another shot of the author's shadow. Note that the meter now reads about 4 microamperes, since no sunlight is falling on it.
Science is for every one.
Silahkan menterjemahkan artikel ini dan kirimkan kembali untuk kami publish sehingga bermanfaat bagi yang membutuhkannya
Terima kasih.
Tidak ada komentar:
Posting Komentar